Core exercises are essential for building stability, balance, and overall physical strength. A core exercises PDF guide offers structured routines, including planks, crunches, and twists, to target abdominal and back muscles. Perfect for home workouts, these exercises enhance posture, reduce injury risk, and improve athletic performance. Download a PDF for a comprehensive fitness plan tailored to your goals.
What Are Core Exercises?

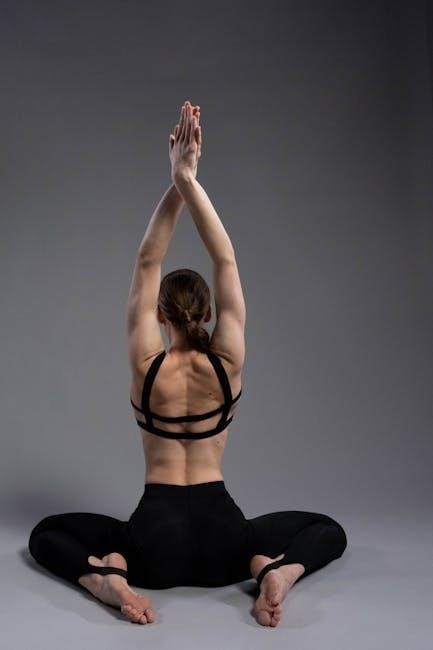
Core exercises target the central muscles of the body, including the abdominals, obliques, lower back, hips, and pelvis. These exercises aim to strengthen the muscles that support the spine and improve overall stability and balance. Unlike traditional abdominal workouts, core exercises focus on functional movements that enhance posture, reduce injury risk, and boost athletic performance. A core exercises PDF typically includes a variety of routines, from basic planks and crunches to advanced twists and leg raises, all designed to engage the entire core. These exercises can be performed at home with minimal equipment, making them accessible for all fitness levels. Regular practice promotes a stronger, more stable foundation for everyday activities and sports.
Why Core Strength Matters
Core strength is essential for maintaining proper posture, balance, and stability. It engages the muscles of the abdominals, obliques, lower back, and pelvis, which act as the body’s foundation. A strong core enhances athletic performance, reduces the risk of injuries, and improves overall physical stability. For athletes, it boosts power and endurance, while for everyday activities, it supports better movement and reduces back pain. A core exercises PDF provides structured routines to target these muscles, ensuring a well-rounded fitness program. Strengthening the core is vital for long-term health and mobility, making it a cornerstone of any effective workout plan.
Benefits of a Strong Core
A strong core delivers numerous benefits, including improved posture, enhanced balance, and better overall stability. It reduces the risk of injuries, particularly in the lower back, and supports efficient movement in daily activities and sports; Strengthening the core muscles also boosts athletic performance by providing a solid foundation for power and endurance. Additionally, a robust core contributes to better functional movement, making everyday tasks easier and less strain-prone. A core exercises PDF offers a variety of routines to achieve these benefits, ensuring a comprehensive approach to core training. Regular practice can lead to long-term improvements in both physical health and overall well-being.
Types of Core Exercises
Core exercises include basic, intermediate, and advanced routines. Basic exercises like planks, crunches, and Russian twists build foundational strength. Intermediate exercises, such as leg raises and side planks, target deeper muscles. Advanced routines incorporate dynamic movements like flutter kicks and dead bugs for enhanced stability and power.
Basic Core Strengthening Exercises
Basic core exercises are fundamental for building strength and stability. These include planks, which engage the entire core, and bird dogs, which improve balance. Supermans target the lower back, while glute bridges strengthen the hips. Knee-to-chest stretches enhance flexibility and reduce tightness. These exercises are perfect for beginners and form the basis of any effective core routine. They can be done at home without equipment, making them accessible to everyone. Incorporating these into your workout ensures a solid foundation for more advanced movements and helps prevent injuries. A core exercises PDF often includes detailed instructions and visuals for mastering these essential moves.
Intermediate Core Exercises
Intermediate core exercises build on foundational strength, introducing more intensity and complexity. Side planks target the obliques, improving lateral stability. Russian twists engage the rotational muscles, enhancing functional strength. Leg raises focus on the lower abs, while reverse crunches strengthen the upper abdominal muscles. These exercises are ideal for those who have mastered basic movements and seek to progress their core training. They improve balance, posture, and overall athleticism. A core exercises PDF often includes detailed instructions and variations to help intermediate trainees challenge themselves safely and effectively. Incorporating these exercises into your routine ensures continued progress and a stronger, more stable core.
Advanced Core Exercises
Advanced core exercises challenge even the strongest athletes, focusing on dynamic movements and functional strength. Hollow body holds and single-arm plank rotations test endurance and stability. Weighted crunches and cable rotations build powerful abs and obliques. These exercises improve core stability, enhance athletic performance, and reduce injury risk. For experienced trainees, incorporating advanced movements like dragon flags or human flag progressions can push core strength to new levels. A core exercises PDF often includes these challenging routines, offering detailed instructions and safety tips. Advanced core training is essential for achieving peak physical conditioning and mastering complex movements with precision and control.
Creating a Core Workout Routine
A well-structured core exercises PDF provides a balanced routine, ensuring proper form and gradual progression. It includes daily and weekly plans, adapting to all fitness levels for optimal results.
Daily Core Workout Plan
A daily core workout plan from a reliable PDF guide can be tailored to suit all fitness levels. Start with foundational exercises like planks, dead bugs, and bird-dogs to build stability. Incorporate dynamic movements such as bicycle crunches and Russian twists to target obliques. For advanced trainees, add weighted exercises or resistance bands to increase intensity. Each session should begin with a proper warm-up and end with stretching to prevent muscle strain. Consistency is key to achieving a strong, functional core that enhances posture, balance, and overall performance in daily activities and sports.
Weekly Core Exercise Schedule
A well-structured weekly core exercise schedule from a PDF guide ensures balanced progression. Start with basic exercises like planks, crunches, and leg raises on Day 1. Dedicate Day 2 to oblique-focused movements such as Russian twists and side bends. Incorporate isometric holds like planks and bird-dogs on Day 3 for stability. Day 4 can include dynamic exercises like bicycle crunches and flutter kicks. Rotate exercises on Days 5 and 6 to target different muscle groups. Rest on Day 7 or opt for light stretching. The PDF guide provides detailed sets, reps, and durations, allowing you to customize the plan based on your fitness level and goals.
Progressing Your Core Routine
Progressing your core routine is crucial for continuous improvement. Start by increasing the intensity, duration, or complexity of exercises. For example, advance from planks to dynamic plank variations or incorporate unstable surfaces. Introduce new movements like rotational exercises or single-sided work to challenge stability. Gradually add resistance using weights or bands to build strength. The core exercises PDF often includes variations and modifications to help you scale exercises appropriately. Mixing up the planes of motion and incorporating functional movements ensures well-rounded development. Remember to allow recovery time and adjust progressions based on your fitness level and goals for optimal results.
Core Exercises for Specific Goals
Target your core for improved posture, balance, or injury prevention. A core exercises PDF offers tailored routines to enhance stability, strength, and athletic performance, addressing specific fitness objectives effectively.
Exercises for Improved Posture
Strengthening your core can significantly enhance posture by stabilizing the spine. Exercises like planks, bridges, and pelvic tilts target muscles that support proper spinal alignment. A core exercises PDF guide provides detailed workout plans, including illustrations, to help you master these movements. Regular practice improves spinal stability, reducing the risk of back pain and promoting a more upright posture. Engage your core during exercises to maximize effectiveness. Consistency is key to achieving long-term benefits for better posture and overall spinal health.

Exercises for Better Balance and Stability
Core exercises play a crucial role in improving balance and stability by strengthening the muscles that support your body’s center of gravity. Planks, side bridges, and bird-dog exercises are excellent for enhancing proprioception and overall stability. A core exercises PDF guide offers detailed routines, including single-leg stands and balance challenges, to help you build a stronger foundation. These exercises not only improve physical coordination but also reduce the risk of falls and injuries. Incorporate these movements into your daily routine for better balance and stability in both athletic and everyday activities. Download a PDF to access step-by-step instructions and progress tracking.
Exercises for Injury Prevention
Core exercises are vital for injury prevention by strengthening the muscles that support the spine, hips, and pelvis. Weak core muscles often lead to poor posture and instability, increasing the risk of injuries. A core exercises PDF guide provides routines that focus on stability and strength, such as planks, bird-dog exercises, and dynamic movements. These exercises improve muscle endurance, enhance joint stability, and prepare the body for physical demands. Incorporating these workouts into your routine can significantly reduce the likelihood of injuries during sports or daily activities. Download a PDF to access safe and effective exercises tailored for injury prevention.

Core Exercise Variations and Modifications
Adapt core exercises to suit your fitness level with modifications like knee push-ups or incline planks. Advanced variations include dynamic moves like bird-dog or side plank rotations. A core exercises PDF guide offers detailed adjustments for each exercise, ensuring safe and effective workouts for all levels. Modify routines to prevent plateaus and keep your training fresh. Use these variations to challenge your core progressively, enhancing strength and stability. Download a PDF for customizable workout plans tailored to your needs.

Modifications for Beginners
For those just starting with core exercises, modifications are essential to ensure safety and effectiveness. Beginners can simplify moves like planks by resting on knees instead of toes. Crunches can be done with support under the lower back or using a gentle rocking motion. Bird-dog exercises can start with smaller movements to maintain balance. A core exercises PDF guide often includes step-by-step adjustments for novices, such as using a towel for stabilization or reducing the range of motion. These modifications help build foundational strength and proper form, reducing the risk of injury. Focus on controlled movements and gradual progress to establish a strong core base.
Variations for Advanced Trainees
Advanced trainees can enhance their core workouts with challenging variations that target deeper muscles and improve functional strength. Exercises like dead bugs with leg extensions or supermans with weighted arms increase intensity. Side bridges and plank variations, such as single-arm or single-leg planks, also add complexity. Incorporating equipment like stability balls or resistance bands can further intensify routines. A core exercises PDF guide often includes these advanced options, allowing trainees to progress beyond basic movements. Focus on maintaining proper form while pushing limits to maximize results and achieve a more resilient, powerful core.
Low-Impact Core Exercises
Low-impact core exercises are ideal for individuals recovering from injuries or preferring gentle routines. Planks, bird dogs, and pelvic tilts are effective options that avoid excessive strain. Isometric holds, such as wall sits or seated marches, strengthen without joint stress. A core exercises PDF often features these modifications, ensuring accessibility for all fitness levels. Focus on controlled movements and deep breathing to engage muscles properly; These exercises enhance stability and posture without high-intensity movements, making them suitable for long-term sustainability and injury prevention. They are perfect for maintaining core strength in a safe and sustainable manner.

Common Mistakes in Core Exercises
Avoiding proper form and failing to engage core muscles are frequent errors. Relying too much on equipment and neglecting pelvic neutrality can hinder progress. A core exercises PDF guides correct techniques to prevent these pitfalls and ensure effective workouts.
Overlooking Proper Form
One of the most common mistakes in core exercises is neglecting proper form. Without maintaining correct posture and muscle engagement, exercises like planks and crunches can lose effectiveness or even lead to injury. A core exercises PDF often includes visual guides and step-by-step instructions to help users master each movement. For instance, in a plank, keeping the spine neutral and engaging the abdominals is crucial. Similarly, during crunches, lifting with the neck rather than the core can strain muscles. By referencing a PDF guide, individuals can ensure they’re performing exercises safely and effectively, maximizing their core workout benefits.
Not Engaging the Core Muscles
Failing to engage the core muscles is a prevalent error that diminishes the effectiveness of exercises. Many individuals perform movements without activating their abdominals, leading to poor results and potential harm. A core exercises PDF emphasizes the importance of drawing the navel toward the spine to activate the transverse abdominis. For example, in a plank, disengaging the core can cause the hips to sag, putting strain on the lower back. By following the instructions in a PDF guide, users can learn proper activation techniques, ensuring their workouts are both safe and effective in targeting the intended muscles.
Exercises to Avoid
Certain exercises can be detrimental to core health if performed improperly or overemphasized. A core exercises PDF often advises against movements that strain the spine or neglect stabilizer muscles. For instance, heavy weights with poor form in exercises like crunches can lead to neck pain and back injuries. Similarly, avoiding exercises that promote excessive arching or twisting without proper core engagement is crucial. The PDF guide recommends focusing on controlled movements and isometric holds, such as planks and bird dogs, to safely strengthen the core without risking harm. By eliminating ineffective or risky exercises, users can optimize their workouts for better results and longevity.

Downloading and Using a Core Exercises PDF

A core exercises PDF provides a comprehensive guide to strengthening your core with structured routines and customizable plans, perfect for home workouts and tracking progress effectively.
How to Find a Reliable Core Exercises PDF
To find a reliable core exercises PDF, look for guides from reputable fitness websites or certified trainers. Ensure the PDF includes detailed instructions, images, and progression plans. Check for expert endorsements or reviews to verify credibility. A good core exercises PDF should cover various exercises, from basic to advanced, and offer modifications for different fitness levels. Many websites, such as Darebee or The Fitness Phantom, provide free downloadable guides with structured workouts and tips for proper form. Always prioritize resources that emphasize safety and effectiveness to maximize your core training benefits.
Using the PDF Guide for Workouts
A reliable core exercises PDF serves as a comprehensive guide for effective workouts. It typically includes detailed instructions, images, and structured plans to help you perform exercises correctly. Start by reviewing the guide to understand proper form and techniques; Follow the recommended sets, reps, and durations for each exercise to maximize results. Many PDFs also provide warm-up routines and nutritional advice to complement your core training. By consistently using the guide, you can improve posture, balance, and overall stability. Adjust the plan based on your fitness level and goals for a personalized approach to core strength.

Customizing Your PDF Workout Plan
The flexibility of a core exercises PDF allows you to tailor workouts to your fitness level and goals; Start by assessing your current strength and identify areas needing improvement. Choose exercises from the guide that target specific muscle groups, such as abs, obliques, or lower back. Adjust the number of sets, reps, and intensity based on your progress. Incorporate variations for beginners or advanced trainees, and rotate exercises to avoid plateaus. Many guides also offer low-impact options, making them suitable for individuals with mobility issues. By personalizing your plan, you ensure a balanced and effective approach to core training, enhancing both strength and stability.
Consistency is key to building a strong core. Use a core exercises PDF to guide your journey, ensuring progress and a well-rounded approach to fitness. Stay committed, and see transformative results.
Final Tips for Success
Consistency is key to building a strong core. Track your progress and gradually increase intensity. Incorporate variations from your core exercises PDF to avoid plateaus. Focus on proper form to prevent injuries. Listen to your body and rest when needed. Stay hydrated and maintain a balanced diet to support muscle growth. Celebrate small milestones to stay motivated. Mix core workouts with other exercises for a holistic fitness routine. Remember, a strong core enhances overall stability, posture, and athletic performance. Stay committed, and over time, you’ll achieve a stronger, more resilient body.
Maintaining Consistency in Core Training
Consistency is crucial for building and maintaining core strength. Aim to perform core exercises 2-3 times weekly, using a core exercises PDF as a guide. Create a routine and stick to it, even if it’s just 10-15 minutes daily. Track progress and gradually increase intensity or duration. Vary exercises to keep workouts engaging and prevent plateaus. Focus on proper form to avoid injuries. Listen to your body and rest when needed. Stay motivated by celebrating small achievements. A consistent core routine enhances posture, balance, and overall fitness. Combine it with other exercises for a well-rounded fitness plan. Over time, persistence will yield noticeable results.